Monday, August 13, 2012

Princess Ann Braid

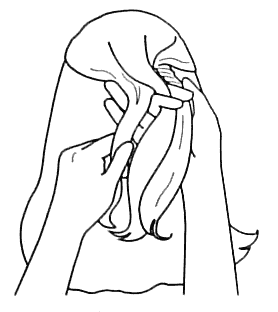
1. Start with a clean straight part down the middle of the head, just as if you were going to make pigtails.

You are going to make French Braids out of both of these sections, starting at the top and working your way down to the neck. When you are done with the first braid, fasten it.
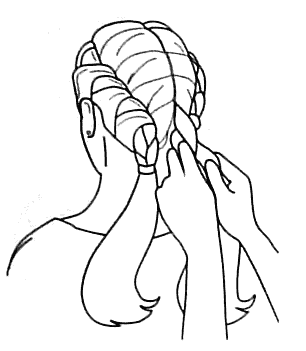
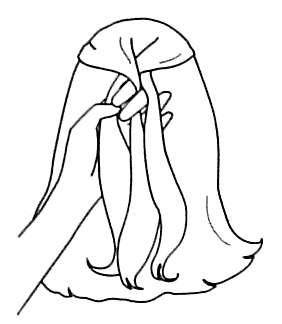
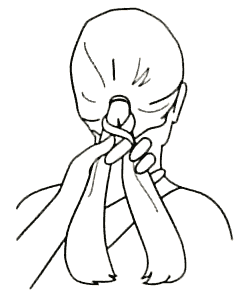
Princess Anne braid step 1
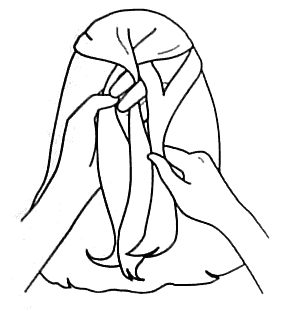
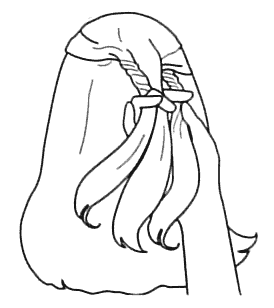
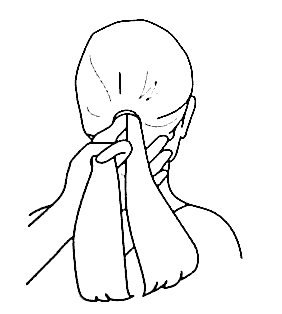
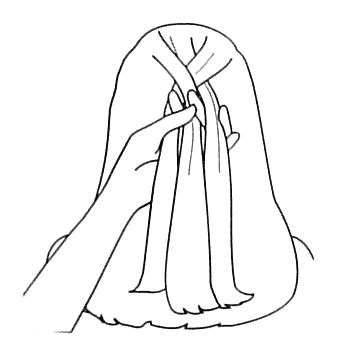
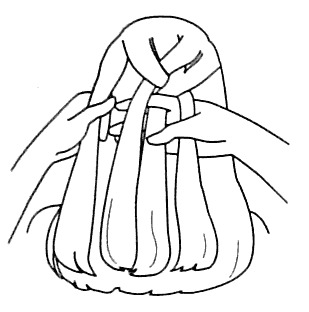
2. Once you get to the bottom and both French pigtails are finished, unfasten the first braid and hold the right tail in the right hand and the left tail in the left hand. Your palms should be facing up. Make sure to keep all 6 strands separated between your fingers.
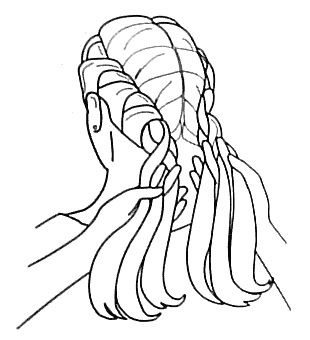
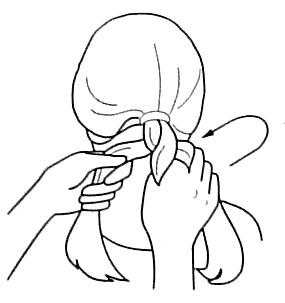
Princess Anne braid step 2
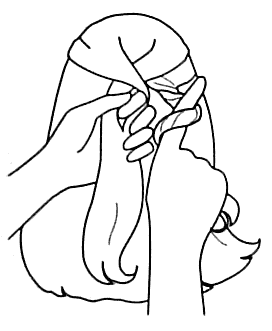
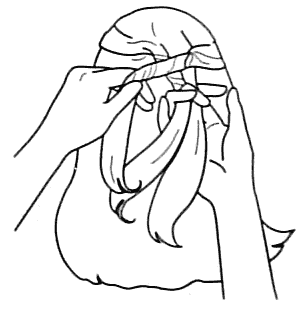
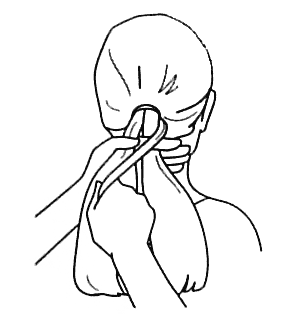
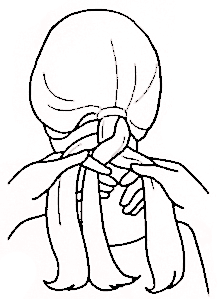
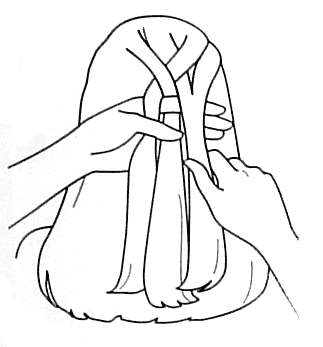
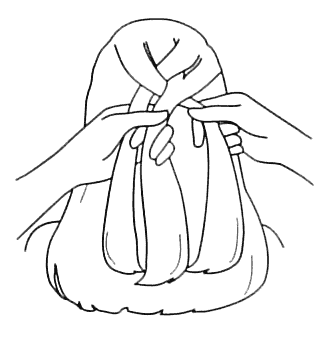
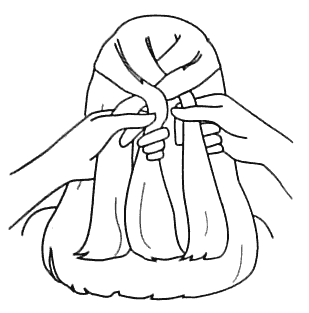
3. You want to have both braids ending with the right strand crossing over middle. Now turn your right hand over so that your palm is facing down and combine these 3 strands with the 3 strands in your left hand, (such as... left strand with right, middle strand with middle, right strand with left)
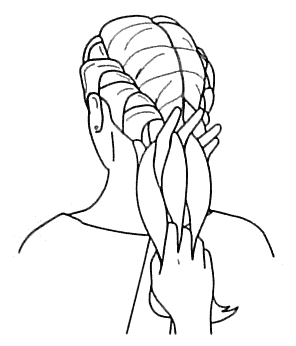
Princess Anne braid step 3
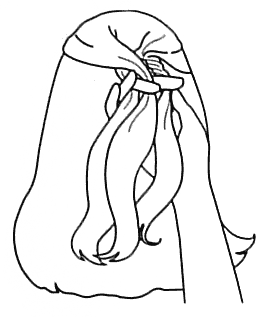
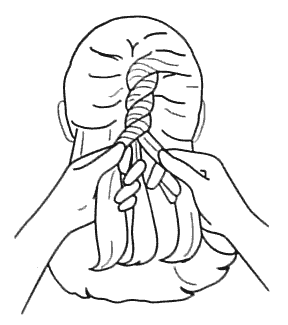
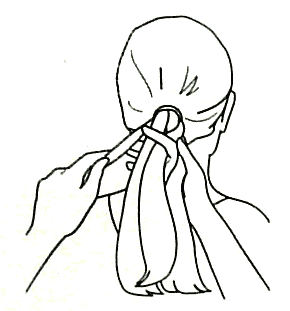
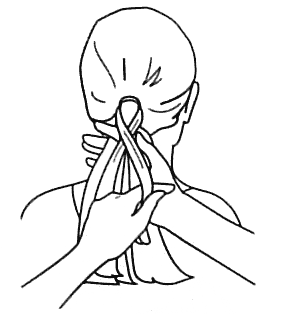
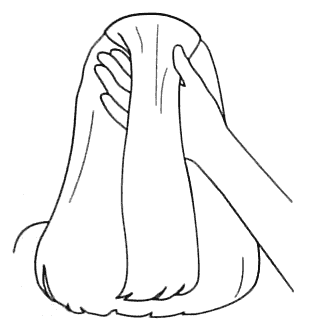
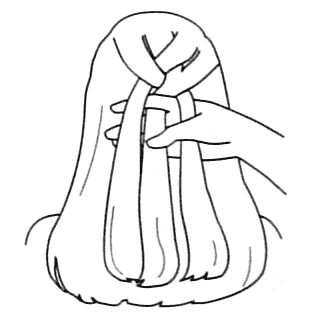
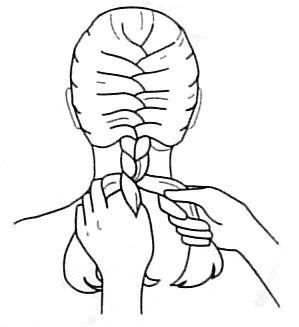
4. Pull these strands tight and finish with a Basic Braid. Then fasten with elastic.
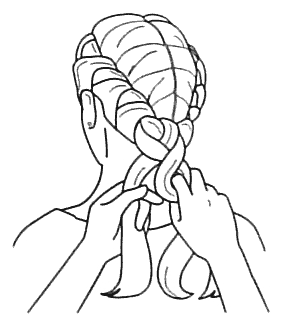
Princess Anne braid step 4
http://2good2lose.com/braid-princessanne.shtml

French Rope Braid

1. To start, take a section from the top of the head as if you were going to make a French Braid. Separate this section into three strands of hair. Bring the right strand over the middle and then the left strand over the middle.
French Rope Braid Step 1
2. Hold all 3 strands in your left hand. (Make sure you keep them separate) Gather a small even section from the right side and add it to the right strand.
French Rope Braid Step 2
3. Now you are going to start to wind this strand to the right.
French Rope Braid Step 3
4. Next, change all of the strands over to the right hand while being careful not to mix strands or unravel the twist.French Rope Braid Step 4
5. Now gather another section from the left side and add it to the left strand.
French Rope Braid Step 5
6. Wind the strand to the right. This is when you may need an extra set of hands.
French Rope Braid Step 6
7. With your left hand bring the wound right strand over to the left. Now, the right twist is now left. The left twist is in the middle and the other strand is on the right ready to have hair added to it.
French Rope Braid Step 7
8. You are going to repeat steps 2 thru 4 until all of the hair is caught in this braid.
French Rope Braid Step 8
http://2good2lose.com/braid-frenchrope.shtml
Finish off with a Rope Braid and fasten with an elastic.

Fishtail Braid

1. Once you have separated the ponytail, you are going to start out by holding the 2 strands in your left hand.
Fishtail Braid step 1
2. Now you are going to take a thin piece from the outside of the right strand and join it with the left strand.
Fishtail Braid step 2
3. Reverse how you are holding hair and switch hands.
Fishtail Braid step 3
4. With your left hand take a thin piece from the outside of the left strand and join it with the right strand.
Fishtail Braid step 4
5. You are going to repeat steps 2 and 3 until the braid is as long as you desire. Then finish with an elastic.
Fishtail Braid step 5
http://2good2lose.com/braid-fishtail.shtml

Basic Braid

1. Separate the ponytail into 3 equal strands. Hold 2 strands in your right hand with your palm facing up. Hold the third strand in your left hand.
basic braid step 1
2. Turn your right hand over so your palm is now facing down. This makes the right strand now in the middle and the middle strand on the right.
Basic braid step 2
3. Switch hands and hold right strand in the right hand and the middle strand and left strands in the left hand with palm facing up. Turn your left hand until your palm is facing down.
Basic braid step 3
http://2good2lose.com/braid-basic.shtml
Repeat steps 1 thru 3 until there is no hair available to braid. Fasten with an elastic.

Dutch Braid

1. Start by taking a section from the top of the head. Separate this section into 3 strands crossing right over middle and then left over middle, as if you were doing a Basic Braid.
Picture 1 French Braid your hair
2. Switch all of the strands over to your left hand and keep strands separated.
Picture 2 Keep the strands separate
3. You can now gather a small even section from the right side of the head with your right hand and add it to the right strand.
Picture 3 Gather a small section
4. Bring the strand you have just added to, over to the middle and bring the middle strand to the right.
Picture 4 Bring the middle strand to the right
5. Now switch hands keeping all strands separate, so your left hand will be free.
Picture 5 Keep strands separate
6. Gather a section of hair from the left side of the head. Add this to the left strand.
French Braid picture 6
7. You will now bring the left strand over to the middle and bring the middle section to the left. As you follow these steps, try to keep your hands close to the head so the braid will be tight.
French Braid step 7
8. Repeat steps 2 and 3 until there is no hair available to add. Finish style with a Basic Braid and fasten with an elastic.
French Braid step 8
http://2good2lose.com/braid-french.shtml

Friday, August 10, 2012

What NOT To Do With Curly Hair. #5

Do NOT wash your hair with hot water. It'll make it frizzy. Try using cool or cold water. It helps tame the frizz and add shine.

Curly Hair Tip #4

I didn't know whether to this as a TO or as a NOT.

Be careful with bobby pins, they snag. When you hair snags it causes split ends, then you have to cut the split ends. My point is bobby pins can be helpful and irritatingly a pest. Oh, by the way there are some bobby pin that say they're snag-less.